Its almost Christmas already! What happened to this year?! It has flown by so fast!
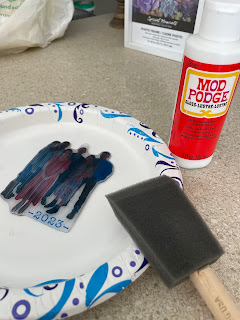
Each year I make or order an ornament with our family picture. This year I decided to try making one with Shrinky Dink plastic.
This stuff is so fun and super easy to use!
You can make just about anything you want... and they are really durable.
I really like how it turned out!... and it should last for a very long time.
So if you don't know how to use Shrinky dink plastic let me show you...
Its really quite fun!
- To start, I bought the printable shrinky dink paper that I could run through my printer to get the photo I wanted...
... there are lots of different kinds of paper ...
some you print on and some you just draw on
so pick what works best for your project.
- I picked the photo I wanted and removed the background.
- I printed on the whole sheet (full page setting) making sure the shiny side was down and the film side was up
- cut it out however you want it to look...
I could've just cut it in a full circle
but I chose to cut right around each person.
- DON'T FORGET to punch your hole in the top if you plan on hanging it
- set your oven to 325 degrees and wait for it to pre-heat
- line a cookie sheet with parchment paper and set your picture on it with the shiny side down and film side up
....(I tried it the other way and it didn't flatten out in the end...
so learn from my mistake)
- once the oven is ready, place your pan with picture inside and set your timer for 1-2 minutes
... this happens so fast so just watch it transform....
- don't worry when it gets all wrinkled and disformed...
mine did the same thing...
once your timer goes off, pull it out
- then I took out a metal bowl and while it was still hot just smash it flat.
- it only takes a couple minutes to cool and
YOU'RE DONE!... almost...
Now, if you like it matted the way it is then you're finished...
but...
if you want to you can put a finish of some kind on it.
I used glossy Mod Podge but...
I've also used clear fingernail polish and they both work great.
Here's what I bought for this project... no link so you'll have to look it up on Amazon.

Merry Christmas!!


